5 Tips for Creating a Fashion Design in Adobe Illustrator

As a fashion illustrator, you want to create fabulous fashion designs. Adobe Illustrator allows you to create unique fashion designs easily. We will discuss five tips that will help you while making your fashion designs in Adobe Illustrator.
To begin creating fashion designs in adobe illustrator, become familiar with the software. Do this by practicing with the tools. Do not worry about doing something wrong in Illustrator. It cannot be broken. Adobe Illustrator is easy to use.
Being able to navigate the adobe illustration program quickly is important as a fashion designer. If someone is new to the software, it can be time-consuming to find the proper shortcuts to use. Together we will explore some tips for navigating Adobe Illustrator.
Which Adobe Program is Used for Fashion Design?
The Adobe program used for fashion design is called Adobe Illustrator. It is an industry-standard vector graphics software. Adobe Illustrator allows artists to create scalable work that will stay true to the original production.
Adobe Illustrator can be used on desktop and iPad to create:
- Drawings
- Logos
- Mobile graphics
- More
It works online and offline. You can pick up where you leave off because Illustrator saves your work to the cloud.
Do Fashion Designers Use Adobe Illustrator?
Fashion designers use Adobe Illustrator for everything from flat drawings to sharing presentation boards. Adobe Illustrator and Adobe Photoshop are some of the most used programs in the fashion industry. Knowing how to use these programs is often required in the fashion industry.
If you are going into fashion design, you will most likely encounter Adobe Illustrator in your fashion design course. This is because it is an excellent program and interfaces seamlessly with adobe photoshop allowing the artist to insert real photos of textile swatches into their designs.
Adobe illustrator also saves all of your work in the cloud and enables you to produce portfolios and presentations. You can also share your design creations remotely.
How Do You Make Fashion Illustrations in Illustrator?
To make a fashion illustration in Adobe Illustrator begin by opening Adobe Illustrator on your computer. Next, you will want to start a new file to bring up your artboard. Then, utilizing the plethora of tools available to you, you will be able to make your fashion illustration.
An example of creating an illustration in Illustrator is to create a button. In Sew Heidi’s tutorial, she shows us how to open our artboard by going to file and then clicking on “new file.” You will see many new settings once it loads.
The artboard appears white. This is the workspace where your creations will be printable. The gray area behind the artboard can still be used and you can keep separate ideas and sketches in the space outside of the artboard until you are ready to use them or delete them.
You will be zooming in and out of your artboard often so you can apply detail and see the entire work in progress. To use zoom, go to view and scroll to zoom in or zoom out and click on the one you desire. This process can be sped up by using a shortcut by pressing the command or CTRL button on your computer while pressing the plus or minus buttons.
To navigate around your artboard you will need to go to the window toggle and scroll to navigate. By clicking on this, the navigator panel appears on your screen. It will give you a mirrored image of your workspace. You can zoom in and out as well as hide it as you need.
By clicking and dragging the navigator you are able to move your artboard around. This provides you with the ability to focus quickly on any part of your design. If you need to move the navigation panel, click the top part of the panel and drag it where you need it.
On the left side of your adobe illustrator screen, you have a toolbar. It has a variety of tools for drawing and illustrating. Many of these are stacked on top of each other. To see the tools underneath, just hover over the desired tool icon, then click and hold. This will display the rest of the tools available under that icon.
To begin drawing your button, you will:
- Go to the rectangle icon and hover over it.
- Select the ellipse tool. Your cursor will show a cross icon showing it is on.
- Draw your circle by holding and dragging.
Your circle will appear and it will show a cross in the center when it is a perfect circle. To make this step easier, depress the shift key while drawing. When done, release your mouse and then the shift key. This will automatically make a perfect circle, and the technique can be used for other shapes as well.
You have your basic circle. Now, you can decide what background and foreground colors you want to use. On your screen, the circle will default to white with a black circle around it. You can select new colors by going to the bottom of the toolbar on the left.
- Click on the solid rectangle with the rectangular frame
- Go to Window at the top of your screen and click on it.
- Scroll down and click on swatches.
- Select the color you want for the fill. This will color your white circle.
- Click on the rectangle to the left again.
- Choose another color. This is your stroke color or background color.
- Change your stroke weight by going to “window” and scrolling to “stroke.” You can manually adjust how thick or thin the stroke weight is from the panel that pops up.
Once you have decided on the swatch colors you will use for your button, you will draw the buttonholes.
For the button, you will want to make four buttonholes. The buttonholes will be perfect circles and will sit within the center of the button you drew. This is a simple process when you know how to use the illustrator program. It is even faster when you learn the shortcuts.
- Draw the first buttonhole by clicking on the upper left part of your large circle. Next, hold down the shift key while dragging the cursor. Release the mouse and then the shift key to make a perfect circle. Adjust the stroke thickness for the buttonhole as desired.
- Change the fill color of the buttonhole to white.
- Copy and paste the next buttonhole by going to edit at the top of your screen, selecting copy, and then selecting paste in front. This will paste the new buttonhole directly over the first buttonhole.
- Drag the new buttonhole over with the arrow key on your keyboard until it is where you want it to be. You can hold the shift key while doing this to speed it up.
- Go to the black arrow selection tool on the left side toolbar. Hold the shift key and select both buttonholes. The blue rectangle that shows what is selected will encompass both buttonholes.
- Copy the two buttonholes at the same time by returning to edit and selecting copy and then selecting paste in front.
- Drag the two buttonholes down by pressing the shift key and the down arrow key until they are in the proper place.
To see the finished button you drew, click anywhere off of your artboard. Now that you have some basic instructions, you can play with the program to create more fashion objects.
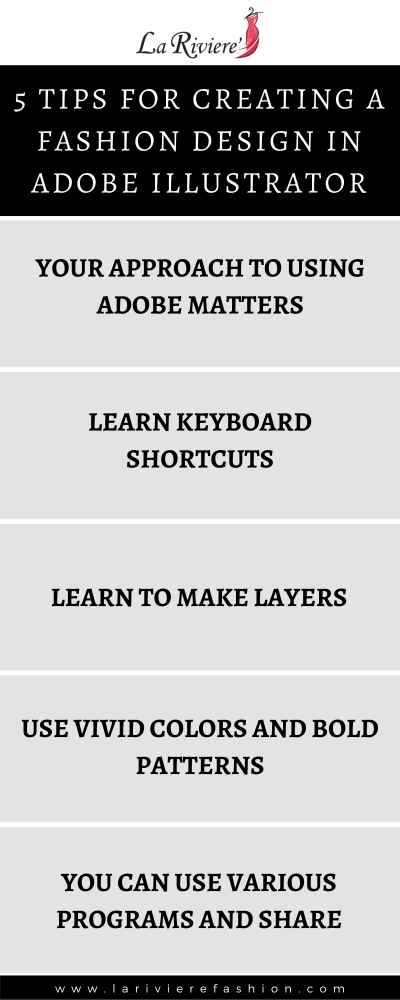
5 Tips for Creating a Fashion Design in Adobe Illustrator
Here are five tips for creating fashion design in Adobe illustrator. Some of these are technical shortcuts to help quicken the artist’s work making their time more productive. Other tips involve using the adobe illustrator program and incorporating other software for greater quality and variety.
1. Your Approach to Using Adobe Matters
Be bold. Adobe Illustrator is easy to use, and it forgives. So, even if you have never tried the Adobe Illustrator program before, you don’t need to worry about freezing the program or breaking it in any way.
If you are new to using adobe illustrator, open it up and take a good look around. There are many tools within tools that are at your disposal. Do some practice runs to see how things work. Don’t be intimidated by the vastness of this digital art studio. With a little practice, you will learn where everything is.
2. Learn Keyboard Shortcuts
There are many keyboard shortcuts embedded in Adobe Illustrator. Many of these you may already know and others will be easy to learn. Adobe Illustrator also allows you to make customizable shortcuts.
Adobe Illustrator has cheat sheets that can be printed. These cheat sheets help the fashion designer remember what keys on the keyboard give commands to alter the work you are putting down.
Some of these shortcuts will:
- Open the color setting dialog box by using:
shift, CRTL, and the K keys for Windows.
For Mac users press shift, command and K.
- To Undo what has just been done press:
CTRL and Z keys for Windows
Control and Z Keys for Mac
- To Paste in Front, press
CTRL and F keys
Control and F keys
- To Open Preferences Dialog Box, press
CTRL and K for Windows
Control and K keys for Mac.
Adobe Illustrator has many different keyboard shortcuts to give you quick and accurate access to various functions and tools. This will help you save time.
3. Learn to Make Layers
Having your designs layered will add depth to your digital fashion designs. Learning how to make layers will help your designs pop. This will attract the viewer to linger on and study your work.
It is easy to create layers with Adobe illustrator. To do so, open Adobe Illustrator and go to “window” then scroll to layers. Since each new document begins on layer one, you can choose and label new layers as you go. Items on these layers can be adjusted while you work.
4. Use Vivid Colors and Bold Patterns
You want your designs to catch and hold the eye of the observer. Using strong visual images to captivate the observer keeps them thinking about your work. Using bold patterns and vivid colors in your Adobe Illustrator designs will help you achieve that goal.
Adobe Illustrator can also be used with Adobe Sparks to create social graphics and short videos. It has over 100 color combinations and templates to help you get started. Each of the templates can be edited for your needs.
5. You Can Use Various Programs and Share the Content With Illustrator
If you have started your designs elsewhere, you can share them with Adobe Illustrator. This works for pencil drawings to digital art tablets. If you have other programs such as Adobe Photoshop, it is easy to share items directly with Adobe Illustrator.
Other programs worth learning through Adobe for fashion design include:
These can be used with Adobe Illustrator to help your fashion design business. With Adobe illustrator and other great adobe apps, you will create your fashion designs and create your own fashion business.
Creating Fashion in Adobe Illustrator
Knowing the tips and tricks to create the effects you want to see in your fashion design is key to your creative success. The tips in this article will help you become familiar with Illustrator. Creating fashion in Adobe Illustrator can be fun and useful.
