How to Curl Short Hair Without Heat Fast!
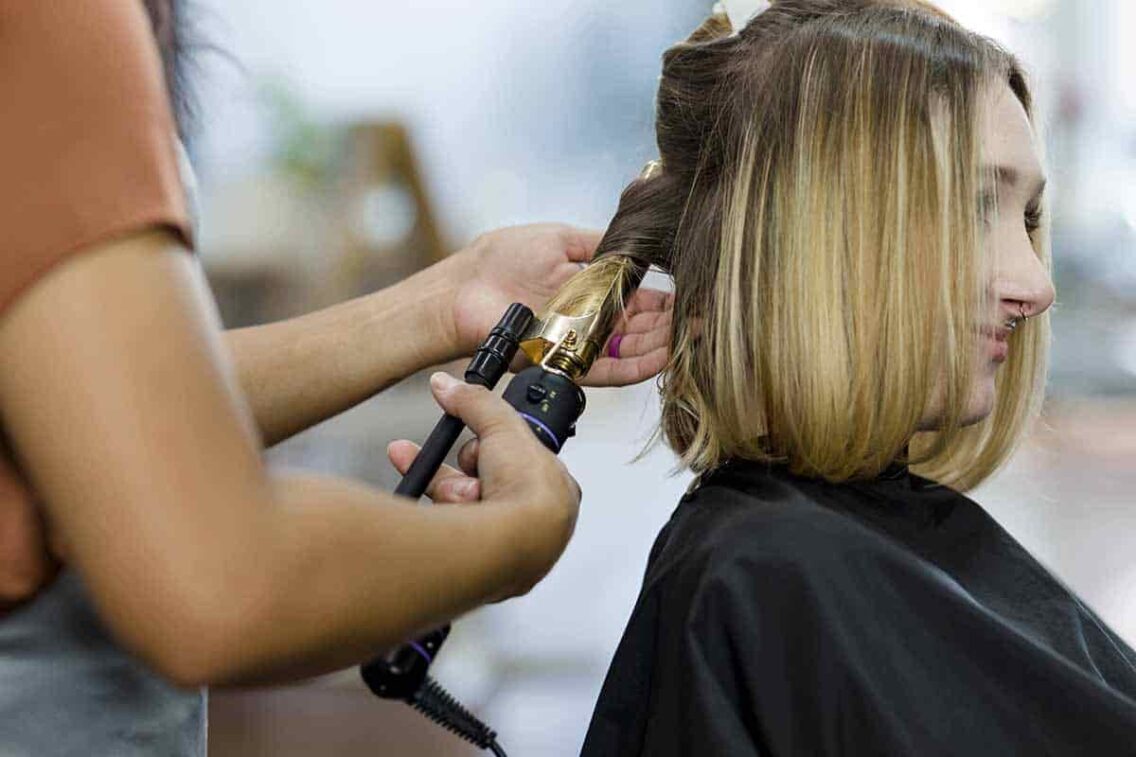
It’s the age-old hair dilemma; you want beautiful bouncy curls or luscious beach waves, but you know you either have to sacrifice time, curl quality, or your hair’s health by applying heat. Curling short hair poses an additional challenge as some curling techniques work best with longer locks. All of this might make it seem impossible for you to quickly curl your short hair without heat, but we’re here to tell you it can be done!
In this article, we’ll show you exactly how you can get bouncy Shirley Temple curls, springy spirals, or luxurious waves without applying any heat to your hair but in a timely manner. Here, you’ll find the best techniques for curling short hair along with all the tools and products you’ll need and a complete step-by-step guide of the process. With a little practice, you’ll be able to walk out your door with beautiful curls every day with minimal preparation time.
How Can I Curl My Short Hair Without Heat Fast?
While you’ll never be able to curl your hair as quickly without heat as you could with heat, there is a way you can get those ideal curls without sleeping in ribbons overnight or sitting around for 5+ hours waiting for your hair to air dry. The key is to prepare your hair properly and use the right products, tools, and techniques. Remember to always use one of the best heat protectant oils for hair before applying any heat to your hair to prevent any breakage or damage.
Our most recommended method for curling short hair fast without heat is to use the Bantu knots or pin curl technique on freshly washed and damp hair that has been dried with a microfiber towel. To expedite drying, sit in front of a fan or use a hairdryer on the “cold” setting to prevent heat damage.
And that’s all there is to it! We’d bet there’s at least one tip or trick in there that had you thinking, “I didn’t know I could do that!” but it’s true. Going heatless or curling short hair doesn’t have to be an inconvenience. Using these techniques, tools, and products, you can have curls that match or even rival those created from curling irons but are far healthier overall, and here’s how.
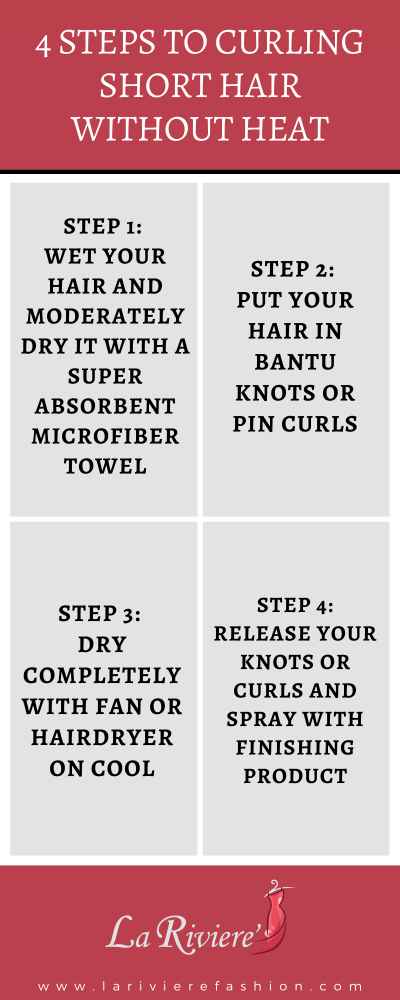
4 Steps to Curling Short Hair Without Heat
Step 1: Wet Your Hair and Moderately Dry It with a Super Absorbent Microfiber Towel
The first step of this guide might seem a bit counterproductive, but it’s essential since we aren’t using heat to curl your short hair. Because of this, you’ll need to wet your hair so that the curls will set as it dries.
However, suppose you’ve ever spoken to a hair stylist or someone who curls their hair daily. In that case, they’ll tell you that dirty hair actually holds curls much better than freshly cleaned hair since washing your hair with shampoo and condition will remove oils that would otherwise help your hair hold its curly shape.
This is why step one is to “wet,” not “wash” your hair since we want those nice oils in there when it’s time to start curling to both expedite the curling process and ensure their longevity throughout the day. Sorry, morning shower-ers, you’ll have to wash your hair at night.
The method you choose to wet your hair here is up to you. You can take a shower and just opt not to wash your hair, you can run it under some water, or you can brush it with a wet comb or brush. Whichever way works as long as it’s wet in the end. Once you’ve done that, you’ll want to remove all excess water by drying your hair with a super absorbent microfiber towel.
Towel drying your hair is always a favored heatless method, but we’re on a time crunch here, so we need to bring in the big guns. A super absorbent microfiber towel is going to remove much water from your hair faster, so it’s damp rather than sopping for the next step. This will be extremely helpful for people with thick hair that seems to hold water for days.
Step 2: Put Your Hair in Bantu Knots or Pin Curls
Most people prefer to style their hair in the morning, but the majority of heatless techniques involve tying or rolling up your short hair and allowing it to air dry for several hours or even overnight. Not only are the several hours of drying inconvenient in itself, but the techniques are time-consuming as well. Some people use rollers, strips of ribbon or even plastic straws to roll up tiny strand after tiny strand.
By the end, you’re mentally and physically exhausted, and your curls are several grueling hours away. This is why we recommend the Bantu knot or pin curl technique because they are much easier and faster than other heatless hair curling alternatives.
Bantu knots have a deep history as a hairstyle that originated in Bantu-speaking tribes in southern and central Africa. The strong women in those communities wear them to represent their deep pride and appreciation for their culture and natural hair.
While we recognize the profound meaning behind this hairstyle and wear it in of itself, using the technique of Bantu knots is also a fantastic way for short-haired individuals to quickly curl their hair, especially if they have thick, coarse hair that is common with black or African individuals.
If your hair is thin and smooth, or you’re concerned about the cultural implications of using Bantu knots to curl your hair, you can opt for the pin curls technique, which is very similar with slight variations.
Both techniques entail stretching your hair (if necessary), sectioning off your hair (the more sections you have, the curlier it will be), and then creating small curled rolls or knots with each section. For Bantu knots, you’ll want to tightly twist your hair into one coiled strand before rolling it into a knot and tucking or pinning the ends. For pin curls, you can roll the hair from tip to root and then pin the curled roll flat on your head.
Make sure to keep your hair damp as you do this to promote optimal curling and apply your styling products of choice for curl longevity.
Step 3: Dry Completely With Fan or Hairdryer on Cool
With your curls of choice in place, it’s time to get your hair dry so you can get on with your day. This is the point when most people would whip out their hairdryer, set it too high, and have their hair dry in minutes.
However, we know that applying heat directly to hair can cause significant heat damage that causes the hair to lose its elasticity and prevent retaining moisture. The result is dry, stiff hair that usually has unseemly split ends. This is why heatless methods are far more preferable for the sake of your hair’s health. So, instead of using a high-heat hair dryer, we have two alternatives: a fan or a cold hairdryer.
Plugging in your trusty fan to dry your hair probably wasn’t the first thought to cross your mind, but trust us, it works. Some individuals with the thickest hair have found that they can completely dry it by sitting in front of a fan for less than an hour. Since your hair should only be damp at this point, it shouldn’t take too long for it to dry completely.
If putting in all of your Bantu knots or pin curls took longer than you would’ve liked, you can expedite the drying process even more by opting for a hairdryer on the “cold” setting. Yes, hairdryers have these, though maybe not all of them, so you might need to snag a new one for this guide. Still, a hair dryer’s increased speed and control versus a fan should have your knots and curls dry in no time.
Step 4: Release Your Knots or Curls and Spray With Finishing Product
Once you’re sure all of your knots and curls are completely dry, especially at the root, you can release them from their bondage and watch as your fabulous curls bounce around right before your eyes.
Before you start to loosen the curls or style your hair anymore, make sure you spray them with a finishing product like a strong hold hair spray to give them the best chance of holding their shape throughout the day.
This technique would be a very good and fast option to have as a service when owning your own hair salon.
YouTube Video on Curling Short Hair Without Heat
While Bantu knots and pin curls are one of the faster methods of curling your hair without using heat, there are other options that take even less time to prepare.
One example is this YouTube tutorial video created by Aida Jamila, who is able to achieve gorgeous curly waves using little more than a couple of bobby pins and some hair oil.
This is an easy, low-effort option that relies on twisting and setting your select section of damp hair to create curls, rather than sectioning off your entire head as you would with the Bantu knots and pin curls. However, Aida’s technique does have to dry overnight, so if you prepare your hair in the morning, this might not be the method for you.
What to Expect From Aida's Hair Curling Tutorial
True to her word, Aidia shows viewers how to curl their hair without needing heat or even tools. Instead, all she does is wash her hair, dry it moderately so that it is damp for the tutorial, and then apply a small amount of hair oil to her damp hair to help the curls form and hold.
From there, she twists the two sections of hair framing her face and pins each individually along the side of her head. And that’s it! All that’s left to do is let the two twisted sections set overnight and then remove the bobby pins in the morning when everything is dry.
Since she only curls two sections of her hair, Aida’s tutorial doesn’t provide a cohesive look of curls, but it’s enough to give you a nice wavy frame around your face and blends in perfectly with the rest of her short hair.
If you have tried everything, and still can’t get you stubborn hair to curl without heat, there are some heat protectant creams for hair that will help you out.
Final Thoughts
Quickly curling your short hair without heat can be a challenge at first, but we promise it’s possible using the techniques listed here. You might need to practice them a little before you’re as quick as you’d like to be, but over time, you’ll be able to curl your short hair effortlessly in record time. Remember to keep your hair damp when using these techniques and add your preferred oils, mousses, or sprays to keep those curls bouncy as long as possible.
(Looking for more amazing tips and tricks for short hair? Check out this makeup academy review! They will teach you all the best tricks to make you look fabulous!)
